Tuesday, April 21, 2009

Interior Resto

After getting my car back i wanted to tackle a few projects that I've neglected for the past, ugh, 14 years. Namely, restoring the console and rebuilding the door panels. It's been 3 and a half long years since i was able to tackle any projects on my car so it was nice to get my hands dirty! I started off by cleaning up and painting the battery tray and replacing both battery cables and the battery. They were all in pretty sorry shape.

Next up was the console. It was in OK shape, all of the gages functioned but it was in need of a few key replacement parts (springs, bumpers, door) along with some select repair and cosmetic work. First step was to strip everything and disassemble it.


These two halfs cost nearly 200 bucks to replace! so i salvaged my old ones...


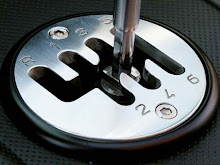
The finished product. National Parts Depot, a nationwide resto company, has a warehouse about 20 minutes from here. I was able to drive there Saturday AM and get nearly everything i needed to do the console and the door panels.


Here's what i found under the door panels as i began to strip them.

 
Posted by Picasa

Stripping

The old panels were in pretty rough shape after many years of use and installation/removal.


I measured everything before final disassembly to ensure the new panels fight as close as possible to the old ones. I'd heard that the new panels weren't very well made but the set i got was pretty decent.

 
Posted by Picasa

Stripping and painting

I wanted to protect the metal backing but not interfere with the glue..so i tried to paint very selectively (i.e. one side only)


Condition of the metal backing before paint.


My outdoor glue zone


I cleaned then painted the entire emblem then circled back with a bit of acetone to remove the paint from key areas.

 
Posted by Picasa

Gluing

Gluing the steel backing is the most critical part. Originally the cardboard backing of the door panel would've been pressed in with a series of punch holes. Without the equipment to do this i had to bend and pound out the old punched holes and strictly glue things on.


The new panels have 3 layers of material..the vinyl..then plastic..then foam. they each have to be glued and trimmed to fit in the right spots.


Posted by Picasa

The finishing touches

Clamping is critical to make sure the vinyl is tight..


The finished product. ready to be installed!

 
Posted by Picasa


Both front panels are done and ready to be fitted to the door. This requires a little finesse (something i have tons of) and some select trimming to get the metal clips to pop into the right spot. Next up is completion of the rear panels then i'll be on the road!

Whats in store for the first drive? Take Mel for some Custard of course!!!